Monday 30 December 2013

HAPPY NEW YEAR!!


MAKING 2014 THE BEST YEAR EVER


I don't normally make New years resolutions....beyond the usual "go on a diet and get fit" ones....and they rarely last more than a couple of weeks! But I have big dreams and plans for 2014, both for our home and for Nostalgiecat....and for myself!
The year that has been has taught me that putting my goals out in public, by blogging about them, makes me more inclined to put my mind to it.....and JUST DO IT!
So today ,on the last day of 2013, I want to share my resolutions for next year. Some of them may sound a little "self-help"...but that is exactly the point!
 

#1 Believe in myself and stay focused and positive.

I have already started a wonderful journey through Nostalgiecat, I just need to credit myself for every small achievement and keep up the good work! It is NOT shameful to want success and to better myself and my circumstances... I may even look into monetizing on the blog in the new year!
 

#2 live in the moment

Get more organised and plan ahead both projects and blog posts, so that I can switch off and really be there for Little Miss Moo and family and friends....and remember to enjoy myself bit more!!
 

#4 Make more of an effort to connect with likeminded people

Remember to "treat others how I would lie to be treated". Sometimes I get so consumed in my own little blogging bubble that I forget to take the time to credit the people that inspires me...I read numerous inspiring blogs, but rush fleetingly from one to the next without leaving comments!
I wow to improve on this in 2014!
 

#5 Tackle the bigger projects around our home 

This WILL be the year I get my arse in gear and sort out the house!!
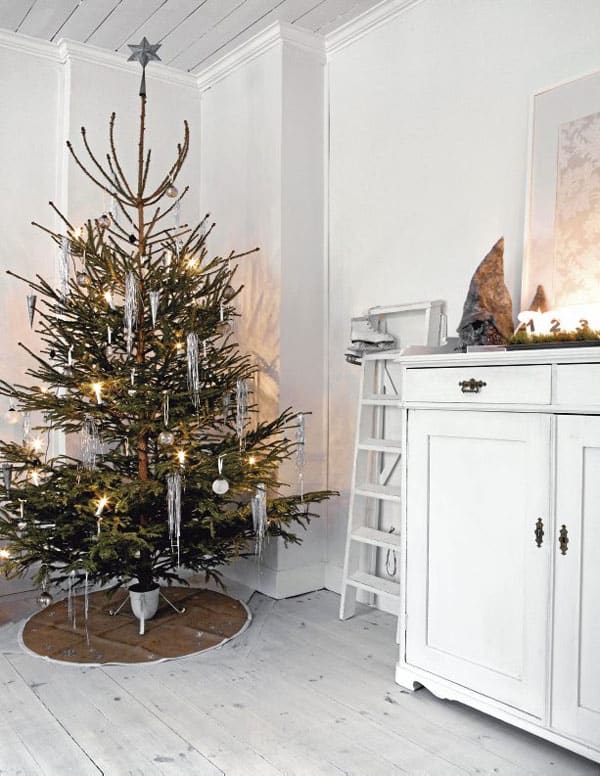
As much as I love all my little projects, it is time I fold up my sleeves and get stuck into decorating and renovating our home!! There is a big TO DO list, but little by little, room by room, I am hoping to update and improve the place....
 
 
...which brings me to the first challenge I have set myself in the New year:
 
 I have signed up to Apartment Therapy's


"We believe that when your home is under control, fresh and clean and organised, good things happen throughout your life"

Apartment Therapy is one of those HUGE blogs that is just chucca block full of inspiration (But you probably knew that already!!) and they are repeating their hugely successful THE JANUARY CURE to help us all get organized in 2014.

Sign up to their daily e-mails throughout January for bite sized and do-able daily assignments and useful information and support and motivation to help you organize your home (and life) for 2014.

Click on the link above the image to find out more...

I am hoping that by doing the January Cure, I will be all set for success in pursuing my other resolutions in 2014...Why don't you join me??

Anyways, I sincerely wish you all a very happy new year!

CHEERIO 2013, HELLO 2014!!

XXX
June


Saturday 21 December 2013

The evolution and history of the Christmas tree...

 looking back in time with nostalgia!

SorrScandinavian Christmas Decorating Ideas-19-1 Kindesign
Picture from lantliv 
Every year at Christmas, all over the world , millions of people bring what we call a Christmas tree into their homes, decorate it and treat it as a symbol of Christmas...
Have you ever wondered why??

Christmas time brings a touch of nostalgia to most of us...We look back at Christmases past with fond memories. We remember how magical this time of year was when we were children, and we try to recreate that same magic for our children...
The twinkling lights on a decorated Christmas tree is perhaps the epiphany of these nostalgic feelings....

I admit it: It makes me feel like a child again...all warm and fuzzy...and full of anticipation!
As a self proclaimed nostalgic, I decided to find out a bit more about the history of the tradition of the Christmas tree, and as a little sidestep from my usual décor and DIY posts, I want to share with you all today, a brief history of the Christmas tree...
 
Here in the UK the tradition of the Christmas tree didn't start until Prince Albert and Queen Victoria was depicted with their children around one in the London Illustrated news in circa 1848.
Many contribute this royal tradition to Prince Albert's German roots, but there is evidence that there had been Christmas trees at Windsor Castle earlier than that....Either way...it soon became popular amongst the English to bring a fir tree into their home and decorate it for Christmas.

 Antique Christmas Tree Illustration via Knick of Time

This "new" tradition soon spread across the Atlantic, as the Americans also embraced the Christmas tree for the Holidays...
The Victorians decorated their tree with real candles to represent stars (a tradition said to have been started by the German church reformer Martin Luther) and handmade decorations. The rich used tinsel made from thin strips of hammered silver, and when man made tinsel was invented and became more readily available and affordable to the general public, this became a popular Christmas tree decoration...
Children with Christmas Tree Die Cut Card ~ Germany 
The popularity of the Christmas tree waned amongst the British after Queen Victoria's death, but was revived in the 1930's when Britain went through a phase of Dickensian nostalgia... And soon there was more options fur the public both in shape of fake Christmas trees, and in terms of an ever increasing variation of decorations becoming more readily available...
The Christmas tree's popularity is still growing, and forever evolving but it can be said with some certainty that we owe the tradition of the modern tree to the Victorians !!
But where did the Victorian royal family get the idea of a Christmas tree from in the first place?

 Instant Art - Giant Christmas Tree - Botanical
The evergreen fir tree was a symbol of eternal life amongst Nordic pagans in countries across northern Europe, and it was the Scandinavian pagans that first brought the tree indoors and decorate it to celebrate winter solstice...this was a celebration that represented the end of the dark and long winter nights, and the beginning of spring and its connection to life.

Norwegian Christmas Cards-O Christmas Tree
It wasn't just the fir tree that were believed to have special powers against the dark magic of winter, but all plants that stayed green throughout the year, like Holly, Mistletoe and Evergreen  was attributed mystical powers.
So when the Nordic countries where violently converted to Christianity in the 8th Century, a lot of the old pagan traditions, like the Christmas tree, was kept on and adapted to make the transition from their pagan beliefs to Christianity easier to stomach for the people...
There is evidence of the fir tree being used in Christmas celebrations all over Northern Europe from around the 10th century, and as we know that the Scandinavian Vikings did trade as far into Europe as the Baltics, it is not far fetched to assume that the tradition of bringing a fir tree indoors for Christmas would have travelled with them. And the first documented use of a tree at Christmas and New years celebrations is in the town square of Riga, Latvia from the year 1510 . Read more about "the first Christmas tree" here.
Germany is widely considered to be the birthplace of the Christmas tree, but it is likely that the Germans got the tradition from the neighbouring Latvians.
Early German Christmas trees were decorated with apples (later adapted into baubles) and ginger bread shapes and paper flowers..

The tradition of the Christmas tree slowly spread and evolved all over Europe, (although the Mediterranean countries were not taken with the tree, choosing instead to display a crib scene) and eventually Ended up as the incarnation made popular by the Victorians, thanks to Queen Victoria and Prince Albert...
The modern Christmas tree comes in more incarnations and varieties than ever, some real and some fake, with people choosing to chop and change their decorations up each year...
Thankfully, with the invention of electric light, the hazardous live candles used to decorate the tree with in Victorian times was soon replaced.
 

With the Christmas tree now being a global phenomena, the decorations and traditions of the Christmas tree is as varied as people themselves...
I for one, am a fan of the traditional Victorian tree...with the traditional decorations that I grew up with in Norway! And I love the current trend in Scandinavia of minimal decorations on a sparse tree.(see top picture)

My family tradition in Norway is to decorate the tree the night before Christmas eve. We listen to Some Christmas tunes whilst decorating the fir together as a family....accompanied with ginger bread and Mulled vine...

I would like to sign off this unusual post with some warm seasons greetings:

I wish you all a very merry Christmas, and I thank you all from the bottom of my heart for popping by!
 Although I am officially taking my holiday now, I will probably post the odd report (or two..) from our Christmas celebrations in Norway....maybe some pictures of our Christmas tree??

xxx
June


PS! If you want to learn more about the history of the Christmas tree , I found these articles informative: the origins of the Christmas tree
Christmas archives
      A Victorian Christmas


Sunday 15 December 2013

DIY Gift wrapping....

 ....creating unique wrapping paper...


Hopefully, like me, you have all your gifts sorted by now...
As much as I would've liked to have made all my friends and family's gifts myself, a big part of this years gifts are in form of gift vouchers (as requested)...
I guess it's a sign of the times we live in....people are struggling for money, and receiving gift vouchers for Christmas, is the only way you can treat yourself to what you really, really want...
But lets face it: An envelope with a gift voucher is not the most exciting thing to give....or to receive..
So in order to make my gifts a little more special, this year I've, in addition to the gift vouchers, got everyone a little something (silly and inexpensive), just so I could gift wrap the presents...
Because a beautifully wrapped present really shows that you care....

So I decided to make an extra effort with my gift-wrap:
I've stamped my own design wrapping paper and tags....and I spent some extra time in making each present a thing of beauty...and saved myself some money in the process...


In today's post I want to show you how I did it...
First I made some easy and cheap unique stamps to customise my wrapping paper with..


Buying designer stamps can get quite expensive, so I've come up with a way to make your own ...for just a few pounds....and with bonus left overs...
On a recent trip to Hobby craft, looking for some festive stamps , I came across these pretty wooden decorative shapes, and I realized that they would be perfect for making my own stamps with.
 There are lots of designs to choose from, and for only 50pence to £1.50 for a pack of 6, you'll have some left after making these stamps to decorate your presents with as well....I chose some pretty birds, some stars and some snow flakes for mine, then I simply glued them onto some cardboard coasters.....


When the glue was dry, I used a foam paint roller to roller on some white acrylic paint before stamping my designs onto some brown parcel paper (you can pick up a large roll of this at your local post office for a few pounds)...

I also used some of this genius coloured parcel paper from Tiger...It has a different colour on each side, and is good value for money  for £2 a roll...and printed my designs onto...making several rolls of  my own unique design wrapping paper in a variety of colours...


I made some easy matching gift tags, by printing my designs onto some brown luggage tags that I picked up cheap from the post office...


The result is a whole range of unique gift wrap....


With my presents all wrapped up, I dug out my plethora of ribbons, bakers twine and decorative accessories: I used Christmas tree decorations, like bells and baubles,  as well as my left over wooden decorative shapes...  


Some I kept quite plain, with just bakers twine and the matching gift tags and decorative wooden shapes to the wrapping paper....Others, I got a bit more creative with: I used washi tape, greenery, snowflake decorations (From my etsy shop),mushroom baubles and pretty clip-on birdies (both from Tiger)....


I took the care to make each present as individual and beautiful as the person receiving it...


....it no longer matters if they just contain a silly something with a gift voucher...
These presents are sure to wow come Christmas...

The vintage-looking wrapping paper is also from tiger, and see how I made the matching vintage gift tags in this post.

I love how these turned out...
What do you think?
Do you make your presents look amazing??
Please share if you have any great wrapping tips of your own!

Next week I will be back with some easy Christmas decorating ideas, and I will be talking about the history of the Christmas tree...

Thanks for popping by,

xxx
June

Thursday 12 December 2013

DIY Geometric gold-leaf necklace.


Today I want to show you how you can make this easy and quick geometric necklace.
This would make a nice little Christmas present for a girlfriend or a young fashionable family member....

I have been wanting to try my hand at some DIY jewellery making for ages, and have been hoarding bits and pieces to do so for a while, but don't worry, all the basic parts of these are readily available at your local Hobbycraft...

You will need:

Gold chain
Gold jump rings
Gold clasps
Oven-bake polymer clay
Rolling pin
Baking paper
Sharp knife
scalpel
Gold leaf
Craft PVA glue
Masking tape
Pencil
Soft brush

These will only take you a couple of hours to make in total, and will cost you less than £20 for all the materials(including the gold-leaf)....and you will have loads left over for future projects...

This is really simple, but here's how I did it:


Roll out your polymer clay (I've used white, but there is loads of colours available) to about 2-3 ml thick...It will help later if you transfer your rolled out clay onto a piece of baking paper at this stage.
Use a sharp kitchen knife and cut out some geometric shapes...I just free-handed mine, but you can of course plan ahead as to what shapes you will need...Then use a pencil or similar to make little holes in your shapes for hanging onto the chain later...Make sure the holes are as close to the edges as possible, and if this distorts the shape or lifts up at all, amend as you see fit....
Place them, nice and flat on a baking tray (this is where it helps having some baking paper underneath)
Cook in your kitchen oven at 150 degrees centigrade for about 5-8 minutes...Keep an eye on them, as you don't want to overcook the pieces...


When you take them out, cover with another piece of baking parchment and place a heavy book on top, to ensure the clay sets as flat as possible...
Leave to cool.


 When your clay pieces has cooled down, stick a piece of masking tape down on your work surface, place the clay piece on top and trace around the shape with a pencil...
Now you can draw your design onto the masking tape, before cutting out the bits you want to gold leaf with a scalpel...Then stick your cut masking tape onto the clay piece, and paint on a thin layer of PVA glue...when you remove the masking tape you should have your design marked out in glue on the shape...


Now you are ready to add some bling, in form of some gold leaf:


Gently place a sheet of gold-leaf on top of the glue...tap down using a soft brush and leave for about 30 minutes...Then use one of the separating paper sheets in your gold leaf book(or some baking paper)....place it on top of your gold leaf and using your fingers, gently rub in the gold leaf...Leave for a couple of hours to fully set before brushing away any excess gold leaf using a soft brush to reveal your gilded design...


I did lots of different shapes and designs....while I was at it like...


Then I got out my chains and other little jewellery bits and played around with the possibilities...
Then I cut the chain to size..(a good way to measure the length needed is to use another necklace as a guide)


I settled for this combination (above).
You can clearly see in these pictures how the chain and clasp is going to get attached...


Before I could attach the jump rings and chain, I sanded the edges and corners of my now gilded clay pieces down, so that they were more rounded...(I didn't want anybody wearing the jewellery to hurt themselves on the sharp edges..)


Then I used a pair of jewellery pliers to attach the jump rings, chain and clasps..
It helps to have 2 pairs for this as it can be quite fiddly...
If you don't have any special jewellery pliers, normal pointed pliers would work just fine as well. 


And there you have it...a funky geometric gold leafed clay necklace...
(And yes...that is one dodgy selfie, I agree)


Here's another one I did, with a "matching" pair of ear-rings...

This is such an easy make....have fun with it and get creative with the shapes and design...the possibilities are endless...

I have really enjoyed making these, and I hope the girl I am giving this to for Christmas will love it!!

I will be back with another post tomorrow, as it is Saint Lucia Day, to show you how it is celebrated in Norway....All going well here in the Nostalgiecat kitchen, I will also post a recipe on the traditional saffron fragranced buns to celebrate the day with...

xxx
June

Wednesday 11 December 2013

Christmas gift ideas for her....

                  ....on Etsy!                        


So, looking around on Etsy for Christmas gift ideas has been such a joy!! If you have not yet discovered Etsy, I would highly recommend that you check it out!!
It is just filled with beautiful and unusual handmade and vintage things....everything from gorgeous jewellery to unique home accessories (there is even furniture....to die for) via funky one-of-a-kind clothes...
 
Today's treasury is very self-indulgent, as this is actually my own wish list for Christmas...
But I am unapologetic about this indulgence, as it features so many lust-have items that I think any girl would find something she liked here...
 

'live like an angel, party like a star...'                                                         

Christmas gift ideas for a rebellious woman...


Large Chevron Toiletry Bag, ...
$45

Arrow Bangle Bracelet- Simpl...
$16

Lotus Flower. Ceramic candle...
$35

The Raven poem on the scarf ...
$35.98

KCLOTH Feather Printed with ...
$18.99

Small Partial Zag Dish
$28

Wall Stencil Birch Forest - ...
$64.95

Hammered Gold Stacking Rings...
$48

Moth origami lampshade white
$59

Gold Zag Tray
$98

20% Xmas SALE Geometrical Il...
$45

Black Knee Length Dress / M...
$109.65

Instant Download Crochet Pat...
$5

Gold Star Necklace - daint...
$24

Carpe Diem 925 Sterling Silv...
$120

Maya pillow cover hand print...
$80


As you can probably tell, I am having a thing about monochrome/grey and gold at the moment...and high on my wish list is the Arrow bangle bracelet from Layered With Love...That with the black knee length dress from Pizka Fashion, would make me feel like a rock star at this years New years eve party!! And then there is the gorgeous gold zag tray from UpInTheAirSomewhere and the maya pillow cover from ChaneeVijayTextiles....certain to bring some new years bling into my home décor...
One of my new years resolutions this year is to finally tackle some of the big decorating projects around the house, and I would love the  Birch forest stencil from Cutting edge stencils for updating our hallway, together with the Moth origami lampshade from Nelliana.
So, if anybody feels like getting a hard working blogger something for Christmas this year....(joke-of course)
 
 
I hope you all are starting to get your Christmas shopping under control now, as it is so important to try to enjoy this magical time counting up to Christmas....
 
Tomorrow I have a beautiful DIY gift for her to share with you all, so please pop back again!
 
 
xxx
June


"